Cherry Hand Pies are a must-try for anyone who loves the taste of cherry pie. The sweet, tangy taste of cherry pie filling wrapped in a flaky pastry for a tasty hand held dessert.
Not only are these cherry hand pies a delicious dessert option, but they’re also incredibly easy to prepare. With a refrigerated pie crust dough and a few simple ingredients, you can whip up this tasty treat in no time at all.
One of the most appealing aspects of this recipe is that it’s ideal for smaller dessert servings. Sometimes, an entire pie can be too much, but these hand pies are just right when you’re serving two or trying to limit yourself from eating the whole thing.


If you’re planning ahead or need to store your dessert for later, these cherry hand pies freeze and reheat well. That means you can enjoy them whenever you need a last minute dessert without any hassle.
Another wonderful feature of this recipe is the use of convenient pre-made ingredients. With refrigerated pie crust dough and cherry pie filling, it’s a breeze to assemble and bake them.
Pie Crust
When making cherry hand pies, you have several options for the pie crust. You can choose to make a homemade pie crust from scratch using this fail-proof Homemade Pie Crust Recipe.
However, because this is an ‘easy’ recipe, I prefer to use store-bought refrigerated pie crust dough. The taste and texture of the pre-made dough have come a long way over the years, and it is hard to tell the difference between refrigerated and homemade pie crust.
Although if you want an even flakier, more delicate crust use puff pastry sheets. The puff up during the baking process and create a light and airy crust that is hard to resist.
Each option works, so choose the one that best suits your preferences and time constraints.
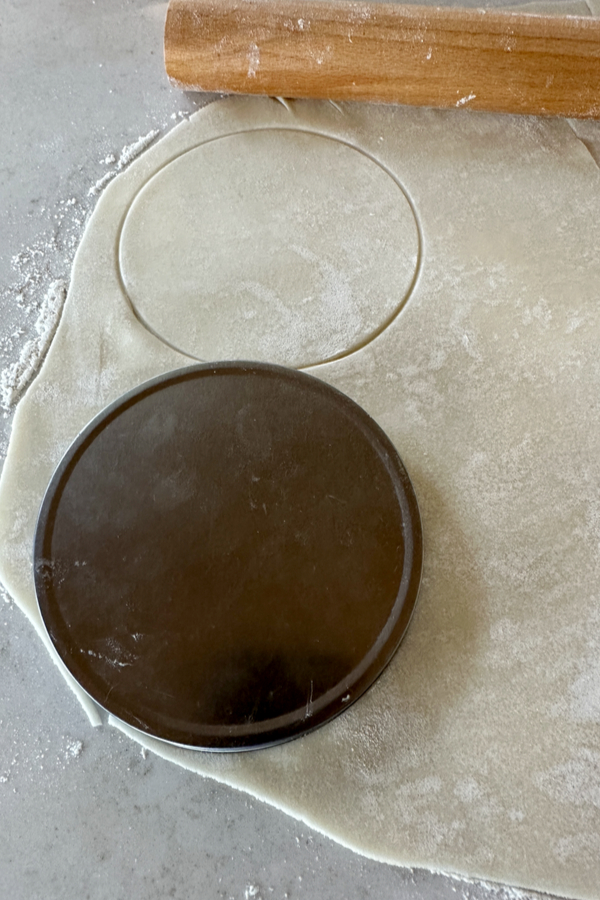
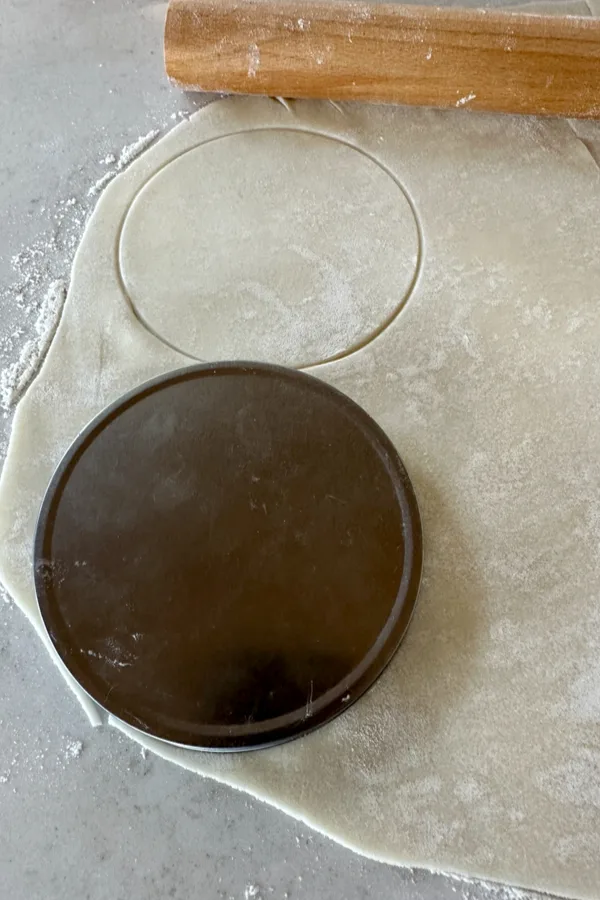
How To Cut The Pie Dough
To create the perfect size for your hand pies, use a 5-inch circle cookie cutter (or another similarly sized object, like a lid or a glass). If you don’t have a circle cutter, you can also use a knife to cut the dough into rectangles instead of circles.
Both shapes will work well for assembling and baking the hand pies.
Cherry Pie Filling
The cherry pie filling is the star of the hand pies. Of course just like you have the option of making homemade pie crust, you can opt to make homemade cherry pie filling as well.
However to do this you must first pit the cherries and then sweeten them with sugar. Then place the mixture in a saucepan and add a corn starch slurry to the mixture until it becomes nice and thick.
Although this is a great option for those who have access to fresh cherries, I prefer another easier and more convenient option. Canned or frozen cherry pie filling is a quick and easy alternative, and one that most of us will use when preparing this dessert.
The Keys To Assembling Cherry Hand Pies
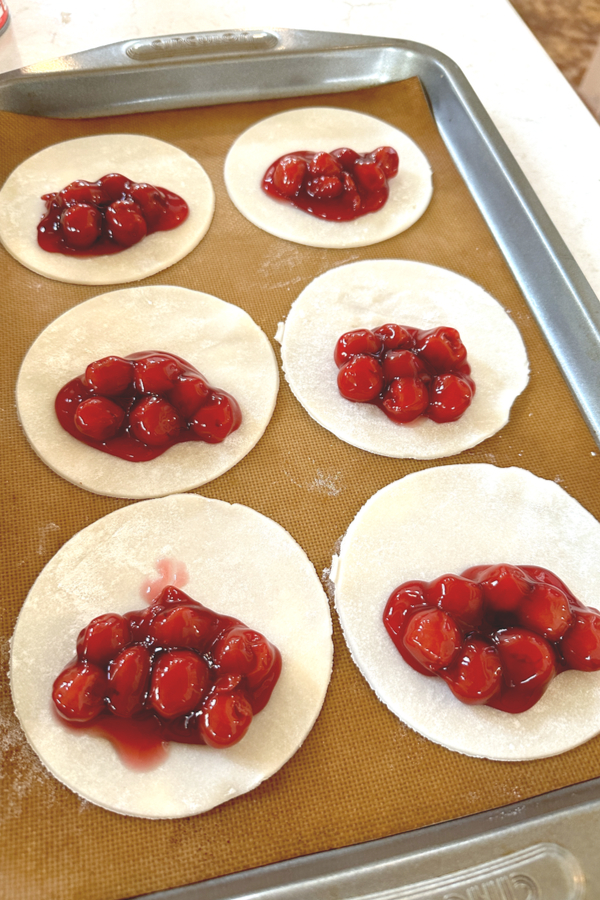
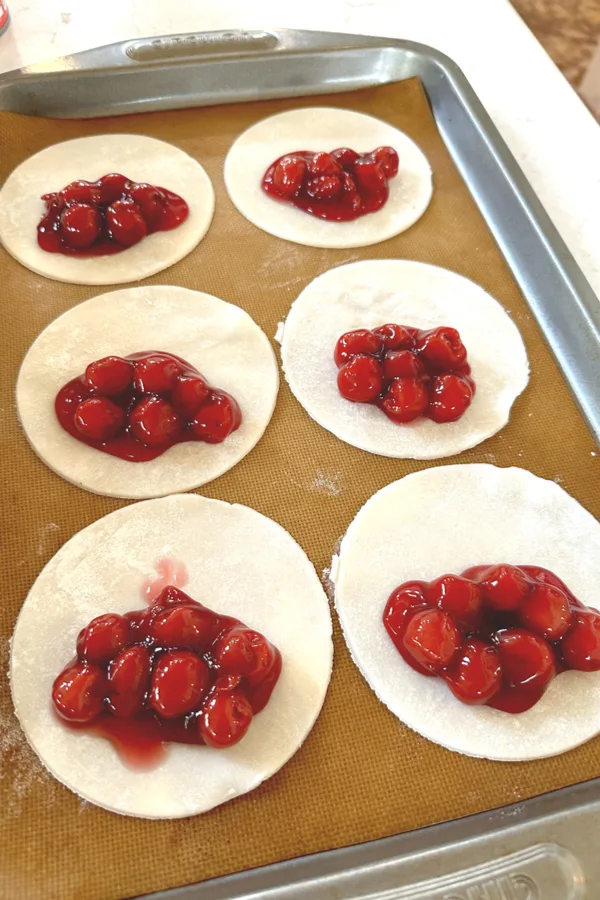
When assembling the hand pies, place the dough circles on the baking sheet before filling to avoid having to transport them later. However, be sure that the edges where you will fold the pies are in the center of the baking sheet. This will allow you to have enough room to crimp the edges to seal.
Another key tip is to not overfill or under fill the pies. For 5 inch circles 2 tablespoons of filling works out perfect. However you will need to adjust the amount if you have larger or smaller circles or rectangles.
Then be sure to use an egg wash to help seal the edges together. It is best to use the tines of a fork or other crimping tool to help ensure they stay sealed.
Finally, be sure to make 2-3 vents in the top of each hand pie to allow steam to escape during the baking process. Allowing the steam to escape will prevent the crust from becoming soggy and soft during the baking process.
Don’t worry if some filling oozes out during baking; it’s natural and it will firm up as the pies cool. Plus, who wouldn’t love a little extra filling on top of the pie crust?
Why Top With Egg Wash & Turbinado Sugar
Topping your cherry hand pies with egg wash and turbinado sugar serves several purposes. The egg wash gives the pies a beautiful golden-brown color and helps the sugar adhere to the surface.
The sugar also adds a subtle crunch and a touch of sweetness that complements the cherry filling perfectly. However if you don’t have turbinado sugar, you can definitely use a coarse sugar or even standard baking sugar although there will be a slight texture difference.
Easy Cherry Hand Pies Recipe
*A printable recipe card is located at the bottom of this article which contains the specific measurements, temperatures and cook times. However, continue reading below to learn about more helpful tips about this specific recipe.
INGREDIENTS
- 9-inch refrigerated pie crust dough
- 2 cups canned or homemade cherry pie filling
- Turbinado or Coarse sugar
Egg Wash:
- 1 large egg
- 1 tablespoon water
INSTRUCTIONS
Before making the cherry hand pies preheat the oven to 400°F (200°C). Then line a baking sheet with parchment paper or a silicone baking mat.
On a lightly floured surface, roll pie crust out to a 12×20-inch rectangle. Using a 5 inch circle cutter (I use a lid to my sugar container) cut the dough into 8 5-inch circles. Place the circles on the prepared baking sheet.
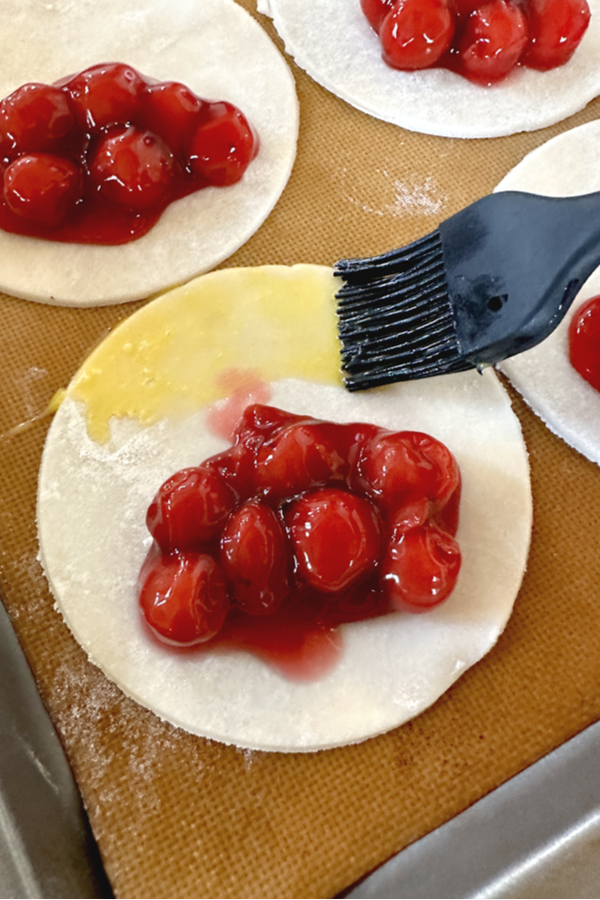
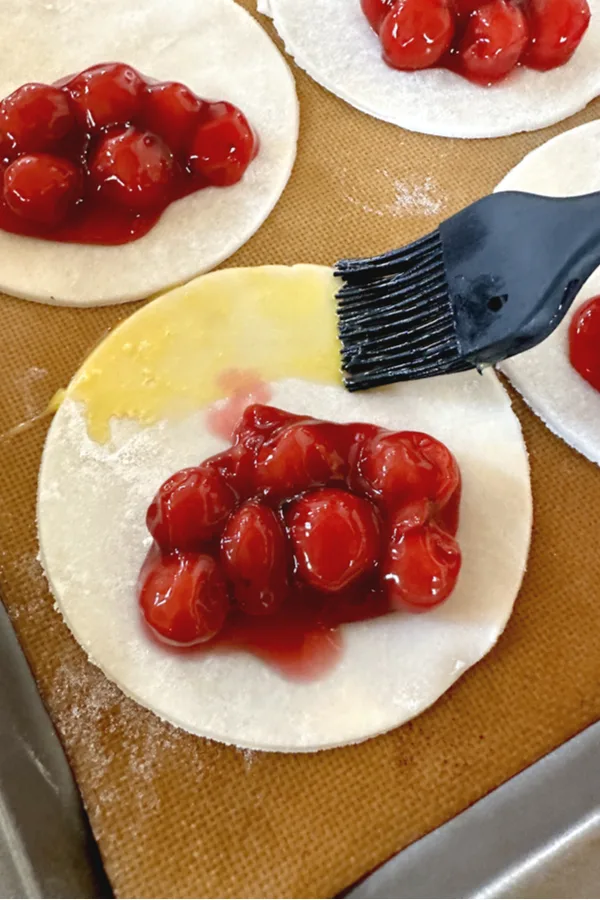
Spoon 2 tablespoons of cherry pie filling in the center of each piece of dough. Prepare the egg wash by whisking the egg and water together until well incorporated.
Brush the egg wash along the edges of the dough and fold in half. *Be sure the half circle edges are towards the center of the baking sheet. Use a fork to crimp the edges to seal.
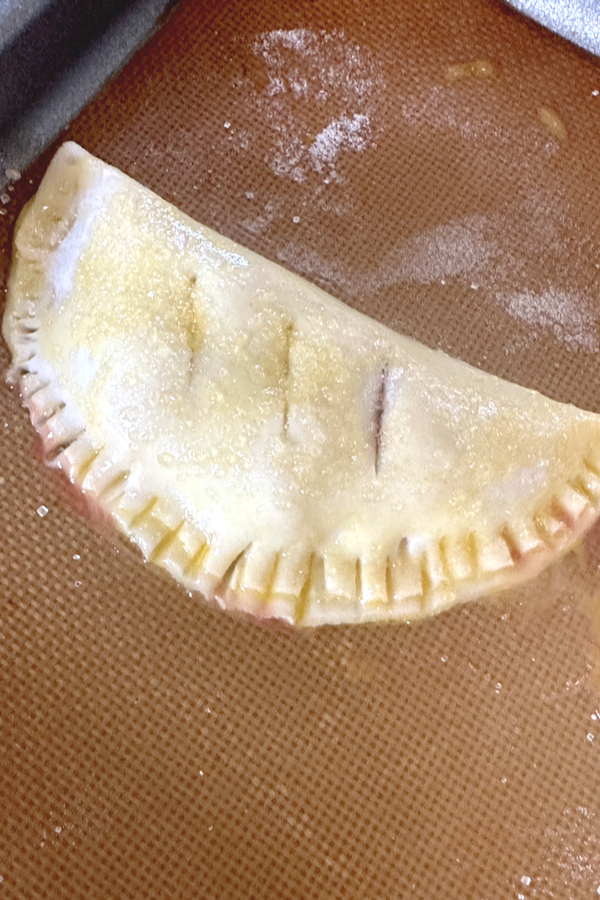
Then use a sharp knife to cut 3 slits into the top of each of the hand pies. Next brush the tops with the egg wash and sprinkle the tops with the sugar.
Place the baking sheet in the preheated oven and then bake for 20 minutes or until the tops of the hand pies are golden brown and the filling is bubbly. Some of the filling will bubble out of the slits or the edges, that’s ok.
Remove the baking sheet from the oven and allow to cool on the for 5 minutes before transferring to a wire rack. Let the hand pies cool completely before eating or storing.
Air Fryer Baking Instructions
If you’d like to bake your cherry hand pies in an air fryer, preheat the air fryer to 400°F (200°C). Place the assembled hand pies in the air fryer basket, leaving space between them for air circulation.
Cook for 10-12 minutes or until the hand pies are golden brown and the filling is bubbly. Be sure to monitor them closely, as cooking times may vary.
To Freeze Unbaked Hand Pies
- To freeze unbaked cherry hand pies, place the assembled hand pies on a baking sheet lined with parchment paper. Cut 3 slits into the top of each pie but do not brush with the egg wash.
- Place the baking sheet with the pies into the freezer and freeze until solid. Store frozen hand pies in a zip-top freezer bag for up to 3 months.
- When ready to bake, place the frozen pies on a lined baking sheet. Brush with egg wash and sprinkle with coarse sugar before baking. Bake at 400°F for 20-25 minutes.
To Freeze Baked Hand Pies
After your cherry hand pies come out of the oven be sure to allow them to cool completely on a cooling rack. Then place the pies on a parchment paper lined baking sheet and freeze for about an hour until they’re firm.
Transfer the frozen hand pies to a freezer-safe container or bag and store them in the freezer for up to three months.

How To Reheat Frozen Baked Cherry Hand Pies
When you’re ready to enjoy your frozen baked cherry hand pies, preheat your oven to 350°F (180°C). Place the frozen pies on a baking sheet lined with parchment paper and bake for 20-25 minutes or until warmed through and crisp. There’s no need to thaw the pies beforehand, as they will reheat evenly from frozen.
You won’t want to miss out on trying these delightful cherry hand pies, perfect for summertime or any special occasion. However if you aren’t a fan of cherries, try this Baked Apple Hand Pies Recipe instead!
Enjoy! Mary
Follow My Facebook Page For Great Recipes For Two! I Cook For Two Facebook Page

To receive FREE recipes delivered directly to your email, be sure to sign up for the iCookfortwo newsletter. A sign up form is located in the middle of this article. If you have any questions, comments, or want to submit an idea for a recipe for two, feel free to email at mary@icookfortwo.com

Easy Cherry Hand Pies
Cherry Hand Pies are a must-try for anyone who loves the taste of cherry pie. The sweet, tangy taste of cherries wrapped in a flaky pastry for a tasty hand held dessert.
Ingredients
- 9-inch refrigerated pie crust dough
- 2 cups canned or homemade cherry pie filling
- Turbinado or Coarse sugar
Egg Wash:
- 1 large egg
- 1 tablespoon water
Instructions
- Preheat oven to 400°F (200°C). Line a baking sheet with parchment paper or a silicone baking mat.
- On a lightly floured surface, roll pie crust out to a 12x20-inch rectangle. Using a 5 inch circle cutter (I use a lid to my sugar container) cut the dough into (8) 5-inch circles. Place the circles on the prepared baking sheet.
- Spoon 2 tablespoons of cherry pie filling in the center of each piece of dough.
- Prepare the egg wash by whisking the egg and water together until well incorporated. Brush the egg wash along the edges of the dough and fold in half towards the center of the baking sheet. Use a fork to crimp the edges to seal.
- Use a sharp knife to cut 3 slits into the top of each of the hand pies. Then brush the tops with the egg wash and sprinkle the tops with the sugar.
- Place the baking sheet in the preheated oven and then bake for 20 minutes or until the tops of the hand pies are golden brown and the filling is bubbly. Some of the filling will bubble out of the slits or the edges, that's ok.
- Remove the baking sheet from the oven and allow to cool on the for 5 minutes before transferring to a wire rack. Let the hand pies cool completely before eating or storing.
Notes
To Freeze Unbaked Hand Pies
- To freeze unbaked cherry hand pies, place the assembled hand pies on a baking sheet lined with parchment paper. Cut 3 slits into the top of each pie but do not brush with the egg wash. Place the baking sheet with the pies into the freezer and freeze until solid. Store frozen hand pies in a zip-top freezer bag for up to 3 months. When ready to bake, place the frozen pies on a lined baking sheet. Brush with egg wash and sprinkle with coarse sugar before baking. Bake at 400°F for 20-25 minutes.
To Freeze Baked Hand Pies
- After your cherry hand pies come out of the oven be sure to allow them to cool completely on a cooling rack. Then place the pies on a parchment paper lined baking sheet and freeze for about an hour until they're firm. Transfer the frozen hand pies to a freezer-safe container or bag and store them in the freezer for up to three months.
How To Reheat Frozen Baked Cherry Hand Pies
- When you're ready to enjoy your frozen baked cherry hand pies, preheat your oven to 350°F (180°C). Place the frozen pies on a baking sheet lined with parchment paper and bake for 20-25 minutes or until warmed through and crisp. There's no need to thaw the pies beforehand, as they will reheat from frozen.
Recipe provided by iCookfortwo.com
Nutrition Information
Yield 8Amount Per Serving Calories 206Total Fat 8gSaturated Fat 3gTrans Fat 0gUnsaturated Fat 4gCholesterol 23mgSodium 136mgCarbohydrates 32gFiber 1gSugar 1gProtein 2g
Nutritional Information is to be used as a general guideline only . Nutritional calculations will vary from the types and brands of the products used.