Instead of baking an apple pie for your next holiday celebration, make these Baked Apple Hand Pies instead! All the flavor of apple pie but served as a delicious hand held dessert.
If you aren’t familiar with the term hand pies, let me explain. Picture yourself heading to a convenience or grocery store in the late 1970s or early 80’s.
On the end cap of the dessert or checkout aisle sat a rack of Hostess brand products. In those infamous horizontal packets, you could find apple, cherry, strawberry, or even lemon pie filling stuffed inside a rectangular, enclosed pie crust.
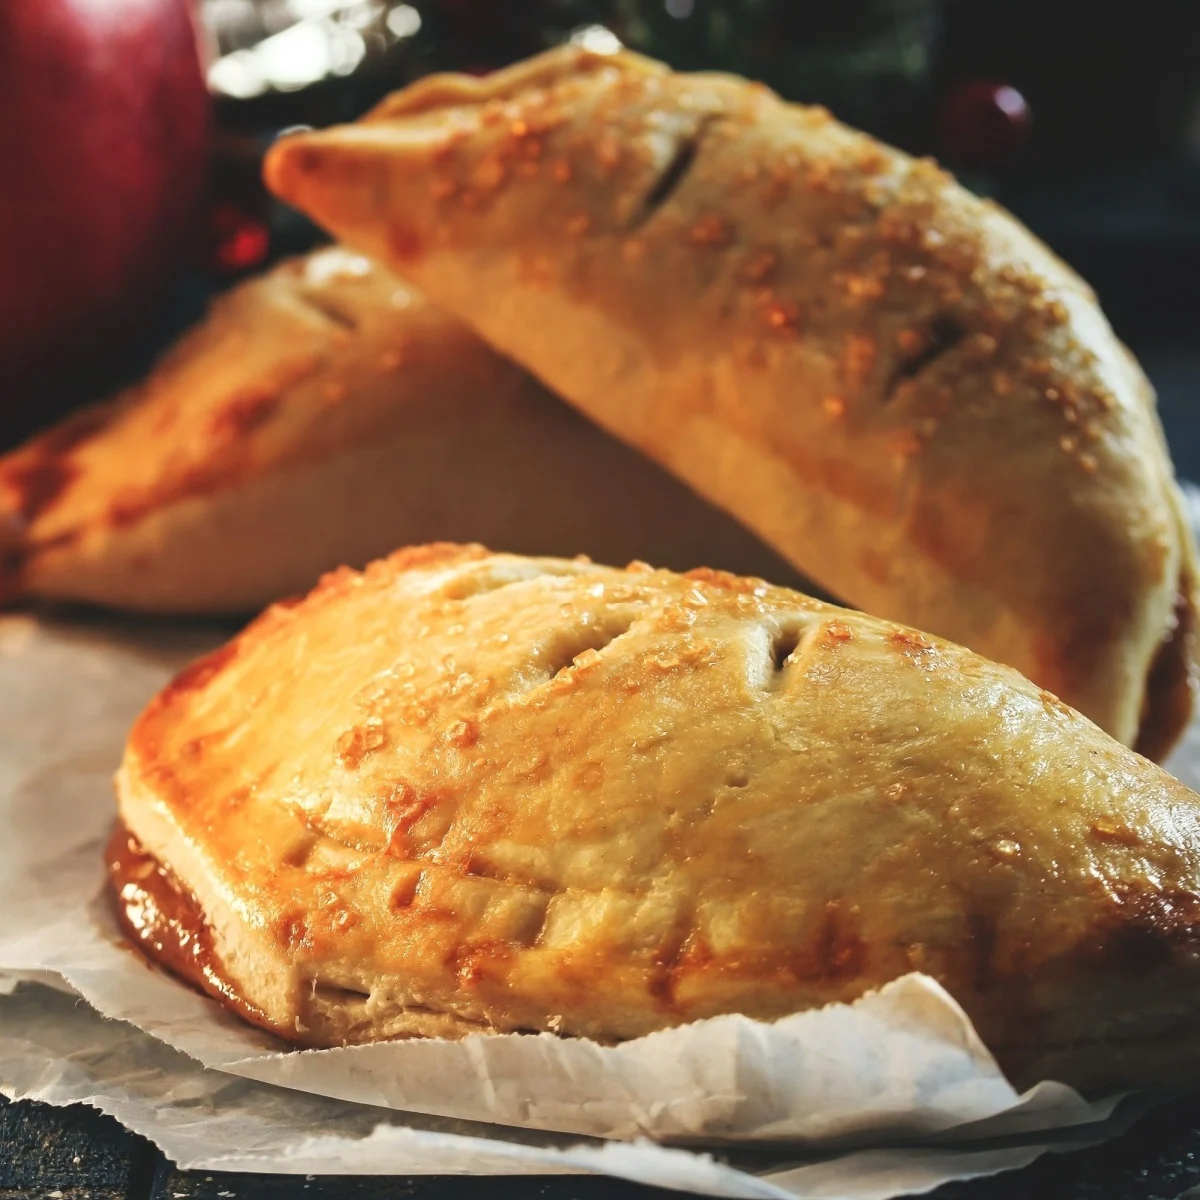
The exterior of the crust was dipped in a glaze that gave you the first bit of sweetness when you took a bite. Then as you continued to unwrap the package and take additional bites, the pie crust would literally met in your mouth and the filling would begin to ooze out around all sides.
The little hand held pies were a special treat that I always looked forward to. You can still find them at some stores, however, if your memory is like mine, they seemed to be much larger in size back then.
Although, they are still amazingly delicious! And recently I have also found them at local Farmer’s market and Amish road side stands.
Although, instead of calling them hand pies, they are called fry pies. That is because instead of placing them in the oven to bake, they are placed in oil so that the pie crust can fry up to become nice and flaky.
STORE BOUGHT vs. HOMEMADE PIE CRUST
Now that I make my own Baked Apple Hand Pies, I most often use store bought pie crust. They are quick and easy to pull out of the refrigerator and I don’t have to spend time making homemade pie crust.
However, if you prefer, you can certainly make your own pie crust. In case you don’t have a favorite pie crust recipe, here is how I make mine.
Mary’s Homemade Pie Crust Recipe
- 1 1/2 cups vegetable shortening
- 3 cups flour
- 1 large egg
- 5 Tbsp. cold water
- 1 Tbsp. distilled white vinegar
- 1 teaspoon salt
In a large bowl add shortening and flour. Cut the shortening with a pastry cutter and work the flour into the mixture. Keep working until the mixture resembles tiny crumbs. Set aside.
In a medium size bowl, whisk the egg. Then add the cold water and white vinegar to the egg and mix.
Pour the egg/liquid mixture into the bowl with the flour/shortening. Add the salt and stir until the dough comes together.
This recipe will make enough dough for 2 pie crusts. Then freeze for 15 minutes before rolling.
For long term storage, separate the dough into two sections. Then wrap each section in freezer wrap and place in an air tight container.
HOMEMADE APPLE PIE FILLING
When it comes to the filling for Baked Apple Hand Pies, you can use either canned apple pie filling or a homemade pie filling. For this recipe, you will use half of the can of standard apple pie filling.
However, if you find apple pie filling that is flavored with cinnamon, you can use that instead. Although, be sure to eliminate the cinnamon in this recipe as written.
And just like the pie crust, you can make your own homemade apple pie filling and use that instead. I make my own Freezer Apple Pie Filling every Autumn when the apples are ready to be harvested.
I will then use the filling to make pies around the holidays and I always make extra for desserts like this one!
COMMON RECIPE SUBSTITUTIONS
And don’t think about making hand pies only with apple pie filling! You can use whatever fruit pie filling that you can think of!
Some of the most common substitutions are peach, strawberry, blackberry and lemon hand pies. I make my own Lemon Curd in my Instant Pot and the filling is perfect to make hand pies!
As for the crust itself, I already mentioned using store bought or homemade pie crust. However, hand pies can also be made using puff pastry dough instead.
Doing so will make the hand pies puff up larger and have a flaky and delicious exterior crust.
Finally, when the pies come out of the oven you can serve them as is. Or to make for a beautiful presentation and double the sweetness, you can sprinkle granulated sugar on top or pour a glaze over the entire hand pie.
As you can see, this recipe is very versatile and can be made to your liking. So let’s get to the recipe!
Baked Apple Hand Pies
*A printable recipe card is located at the bottom of this article which contains the specific measurements, temperatures and cook times. However, continue reading below to learn about more helpful tips about this specific recipe.
INGREDIENTS
- 10 ounces apple pie filling
- 1/2 teaspoon cinnamon (omit if using cinnamon apple pie filling)
- 1 (9 inch) refrigerator pie crust dough
- 1 medium egg
- 1/2 teaspoon milk
INSTRUCTIONS
Preheat oven to 425°F (220°C). Line a rimmed baking sheet with parchment paper or a silicone baking mat. Set aside.
Chop the apple pie filling pieces into small pieces. Add the cinnamon and mix until well incorporated. Set aside.
Place the rolled pie crust dough out on the counter, but still in a roll. Remember, you are only going to use one refrigerator pie crust.
Be sure to freeze the other one so that you can make Pumpkin Pie for Two later in the year!
After taking the crust out of the refrigerator, let it sit at room temperature for 15 minutes so that the dough warms up enough that it can be easily worked.
Roll Out The Pie Crust
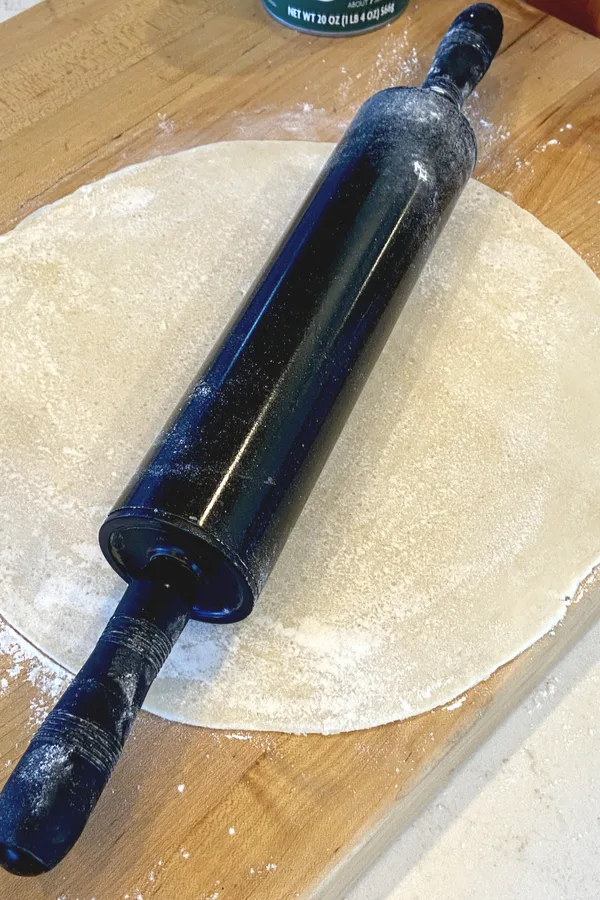
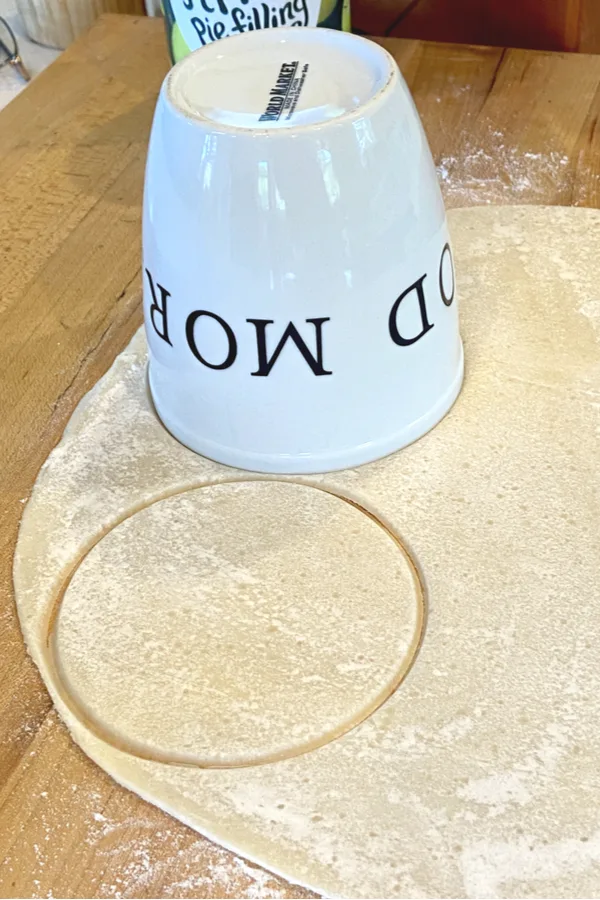
Then use a rolling pin to roll out the pie dough until it is ⅛” thick. Then use a 4-inch circle cutter, to cut out 8 circles.
You will need to use the scraps and roll the dough 2-3 times to get all 8 circles. And don’t worry if you don’t have a 4 inch cutter to make Baked Apple Hand Pies, you can improvise.
I used a large mouth coffee cup to cut out the dough. Search through your kitchen to see what you have to make life easy on yourself.
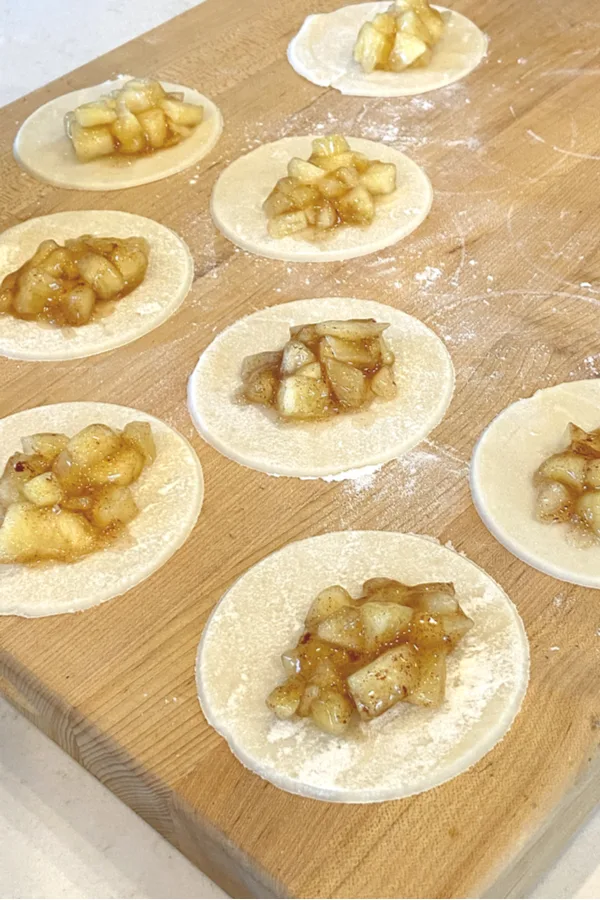
Once the dough is cut into circles, add 1 ½ tablespoons of the apple pie filling to the center of each circle. It will not look like a lot, but do not add more.
This is the perfect amount of pie filling for each 4 inch circle. If your circle is a little less in size, use less filling.
If you use too much filling you will run into two issues. First, it will be hard to fold the pie crust dough over the filling.
Second, during the baking process, the filling will ooze out of the top slits and around the edges. This will leave you with a mess to clean up later.
So trust me when I tell you to resist the urge to add more filling in the center of each circle.
Seal The Hand Pies
Now it is time to seal the hand pies. Start by beating the egg with a little milk until well combined.
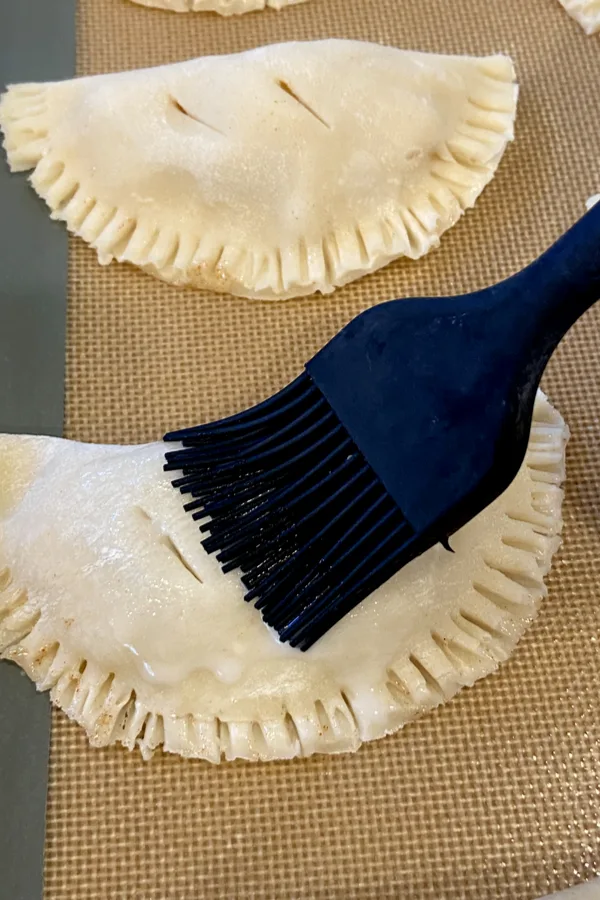
Using a small pastry brush, brush the egg wash around the edges of the circles. Then fold each circle in half, over the filling to form a half circle.
Use a fork to crimp the edges firmly together. Then use a small sharp paring knife to make two slits on the top of each apple hand pie so they can vent while being baked.
Place each hand pie on the prepared baking sheet. Then brush the tops with the remaining egg wash to get a golden and glossy top crust.
Then place in the preheated oven and bake for 12 minutes.
Optional Step: Once you remove the pies from the oven, brush melted butter on top and sprinkle the tops with granulated or coarse sugar.
Egg Free Option
To make this recipe egg free, use water instead of the egg wash to moisten the edges before sealing. Then before baking, brush the top surface of each apple hand pie with milk or heavy cream.
Although without using the egg wash, you won’t get that deep golden brown color and glossy texutre. However, you can place the hand pies under a broiler during the last 2 minutes of baking to get the crust a little darker.
STORING RECOMMENDATIONS
Store in a covered container at room temperature or in the refrigerator. You can also store them in individualized wrappers in the freezer for a quick dessert or snack whenever you need one!
Enjoy! Mary
Follow My Facebook Page For Great Recipes For Two! I Cook For Two Facebook Page

To receive FREE recipes delivered directly to your email, be sure to sign up for the iCookfortwo newsletter. A sign up form is located in the middle of this article. If you have any questions, comments, or want to submit an idea for a recipe for two, feel free to email at mary@icookfortwo.com
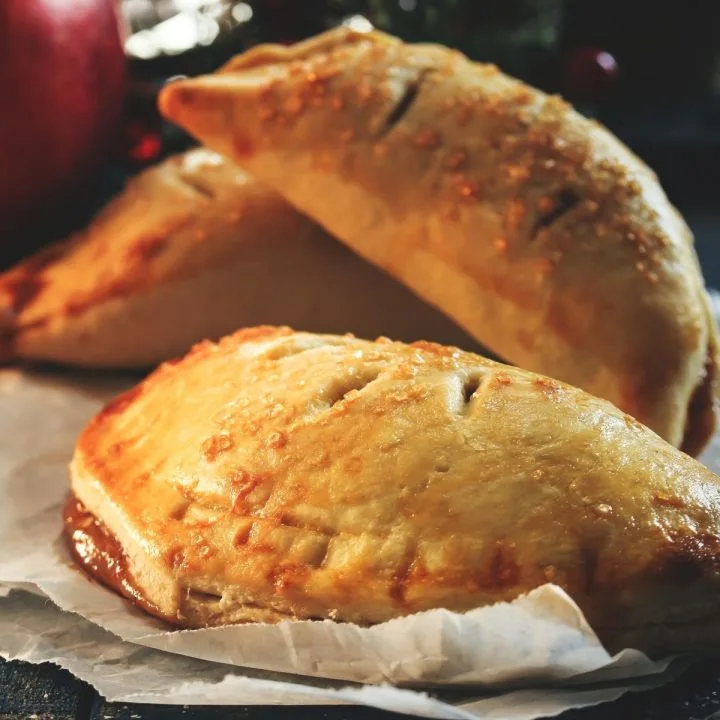
Baked Apple Hand Pies
Use refrigerator pie crust and apple filling to make these delicious hand pies. An easy dessert recipe when you want all the flavor of apple pie but in an easy to eat, hand held treat!
Ingredients
- 10 ounces apple pie filling
- 1/2 teaspoon cinnamon
- 1 (9 inch) refrigerator pie crust dough
- 1 medium egg
- 1/2 teaspoon milk
Instructions
Preheat oven to 425°F (220°C). Line a rimmed baking sheet with parchment paper or a silicone baking mat. Set aside.
Chop apple pie filling into small pieces. Add the cinnamon and mix until well incorporated. Set aside.
Place the rolled pie crust and let it sit at room temperature for 15 minutes. Then use a rolling pin to roll out the pie dough until it is ⅛" thick. Then use a 4-inch circle cutter, to cut out 8 circles. You will need to use the scraps and roll the dough 2-3 times to get all 8 circles.
Add 1 ½ tablespoons of the apple pie filling to the center of each circle. It will not look like a lot, but do not add more. This is the perfect amount for a 4 inch circle.
Beat the egg with milk until well combined. Brush the egg wash around the edges of the circles. Then fold each circle in half, over the filling to make a half circle. Use a fork to crimp the edges firmly together. Use a small sharp paring knife to make two slits on the top of each hand pie.
Brush the tops with the remaining egg wash. Place in the preheated oven and bake for 12 minutes.
Optional Step: Once you remove the pies from the oven, brush melted butter on top and sprinkle the tops with granulated or coarse sugar.
Notes
- To make this egg free, use water to moisten the edges before sealing. Then brush the top with milk. Then place the hand pies under a broiler during the last 2 minutes of baking, being sure to keep a close eye on them so they don't burn.
Recipe provided by iCookfortwo.com
Nutrition Information
Yield 8Amount Per Serving Calories 169Total Fat 8gSaturated Fat 3gTrans Fat 0gUnsaturated Fat 4gCholesterol 20mgSodium 141mgCarbohydrates 23gFiber 1gSugar 7gProtein 2g
Nutritional Information is to be used as a general guideline only . Nutritional calculations will vary from the types and brands of the products used.
